If you’re diving deeper into 3D printing, you’ve probably heard the term “benchmark models.” But what exactly are they, and why should you use them?
Benchmark models are specially designed prints that test your machine’s capabilities. They push different aspects like overhangs, bridging, retraction, cooling, dimensional accuracy, and more. They’re not just test prints—they’re diagnostic tools.
🔍 Why Use Benchmarks?
When I got my first printer, I didn’t understand how one small change in retraction could affect an entire print. I used to tweak blindly—until I discovered benchmarks. Running structured tests saved me hours of guesswork and wasted filament.
Benchmarking models allow you to:
- Identify calibration issues fast
- Compare performance before/after tweaks
- Establish a consistent profile for new materials
- Tune for best quality with minimal trial and error
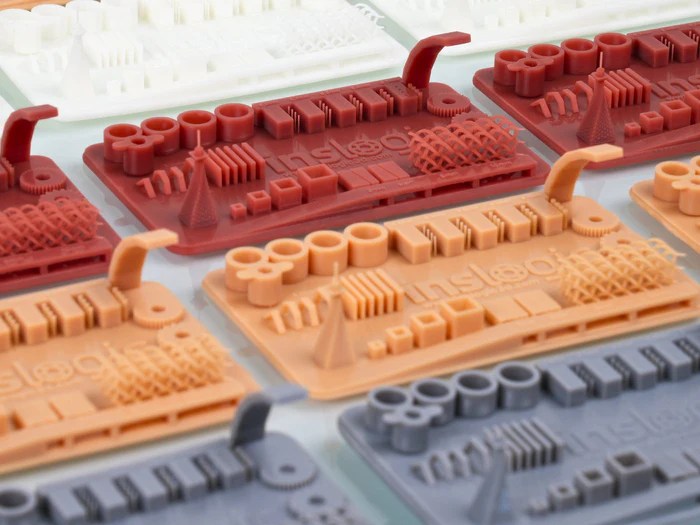
🧱 Common Benchmarking Models
🔺 XYZ Calibration Cube
Tests dimensional accuracy, extrusion consistency, and firmware steps per mm.

🧭 Benchy (The 3D printing torture test)
Evaluates overhangs, bridging, stringing, surface finish, and layer adhesion all in one cute boat.
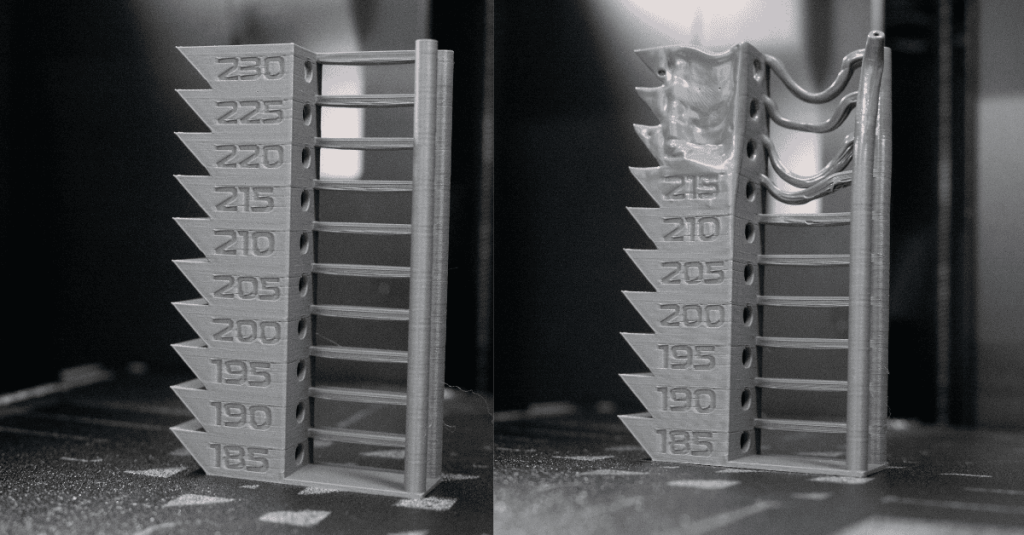
🌀 Temperature Tower
Helps achieve optimal temperature for each filament type by showing how the material behaves at intervals (e.g., from 220°C to 180°C).
🔁 Retraction Test Model

Designed with tiny towers and hops between them, this print reveals how much stringing and oozing occurs. Super helpful when changing filament types or nozzle sizes.
🔩 Tolerance Gauge

Checks how well your printer handles fine tolerances and fit between parts.
🛠️ How to Use Them
Here’s how I usually go about testing a new printer or filament:
- Start with the XYZ Cube – If your prints aren’t accurate, nothing else matters.
- Print a Temperature Tower – Helps nail the best temperature before worrying about flow or retraction.
- Run Retraction and Stringing Tests – Especially for flexible or new filaments.
- Try Benchy – It’s the all-in-one stress test.
- Check bridging and overhang-specific models if you’re getting stringy or droopy layers.
📝 Pro Tip from Experience: Any time I switch brands of filament, especially PLA vs. PETG or TPU, I re-run at least a temperature tower and a quick retraction test. It avoids major print failures later.
🔧 Slicer Tips When Benchmarking
- Disable supports unless testing support performance
- Use slow speeds for clearer detail
- Enable verbose labeling in G-code so you can track temperature or settings mid-print
- Save each model with its purpose in the filename
📂 Where to Download Benchmark Models
🤔 When Should You Benchmark?
- After assembling a new printer
- After a firmware or hardware upgrade
- Switching materials or nozzle sizes
- Dialing in precision for functional parts
- Before critical jobs to avoid surprises
🧠 Final Thoughts
Benchmarking isn’t just for nerds (though I proudly am one). It’s one of the smartest ways to level up your prints without frustration. Make it part of your regular workflow—you’ll get better results, more consistent parts, and fewer surprises mid-print.
💬 Share Your Experience!
Have you tried any of these benchmarking models? Got a favorite torture test of your own—or a fail that taught you something valuable?
👇 Drop your questions, tips, or stories in the comments below!
Let’s build a helpful space for beginners and pros alike.
If you’re struggling with a specific print issue, feel free to ask. I will consider featuring it in a future guide!

Leave a comment