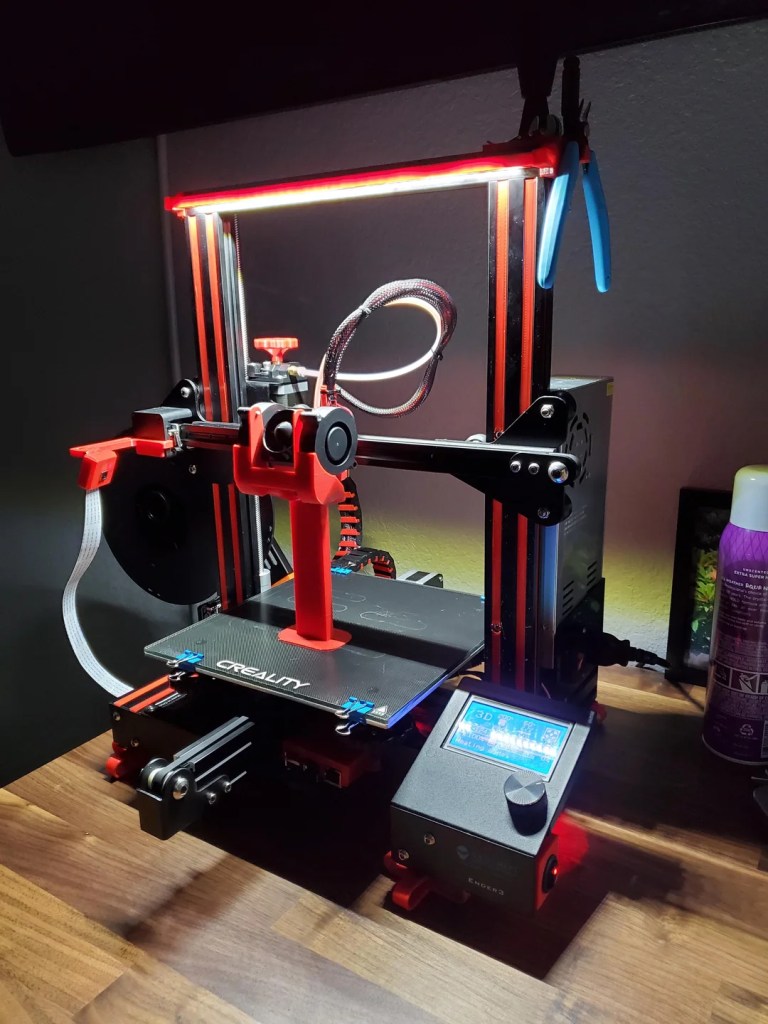
The Ender 3 is one of the most beloved 3D printers in the hobbyist community — and for good reason. Affordable, open-source, easy to mod, and with a huge user base sharing upgrades and tweaks.
If you’re looking to improve print quality, speed, or usability, here are some of the most popular upgrades that will make your Ender 3 feel like a much more expensive machine:
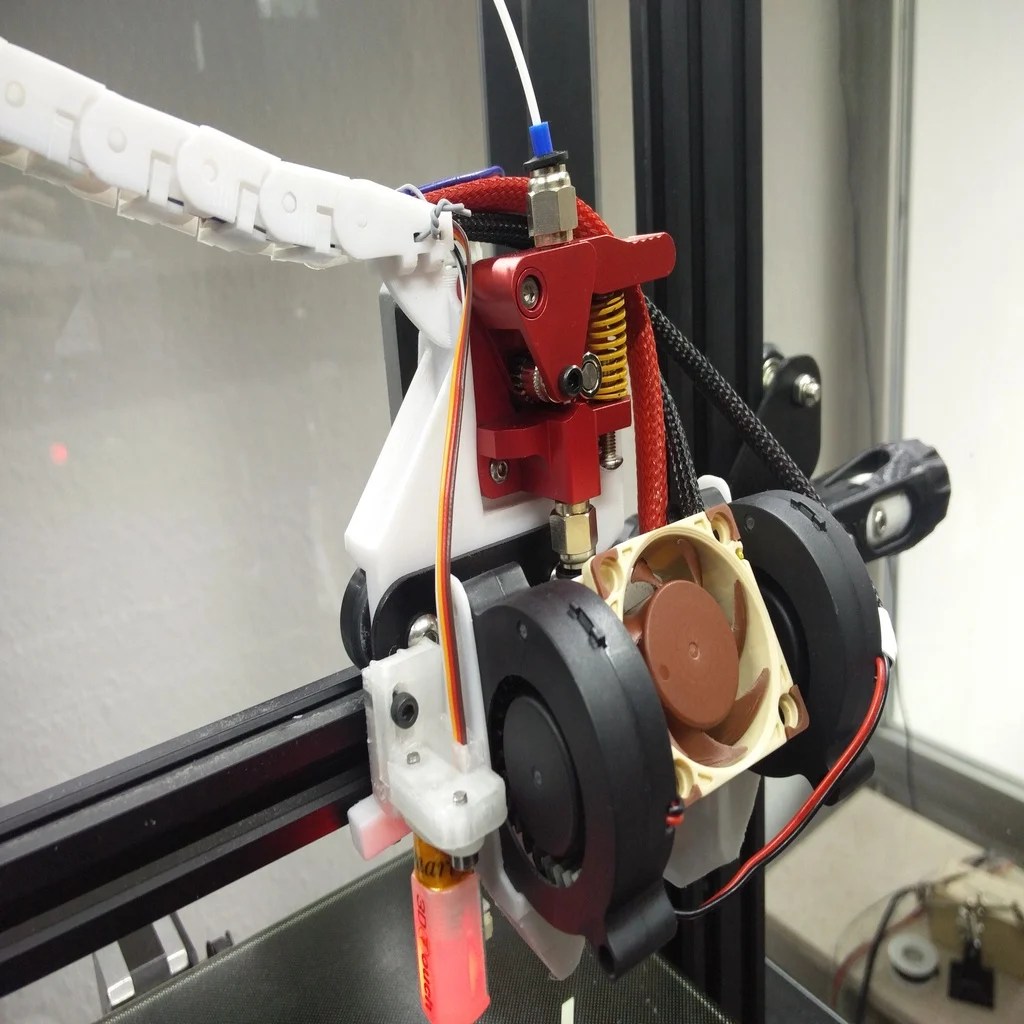
💨 1. Dual 5015 Part Cooling Fan Duct
Replacing the stock fan with a dual 5015 blower fan setup can dramatically improve overhangs, bridges, and fine details. This mod provides more consistent airflow from both sides of the nozzle, helping to cool filament precisely where it’s needed.
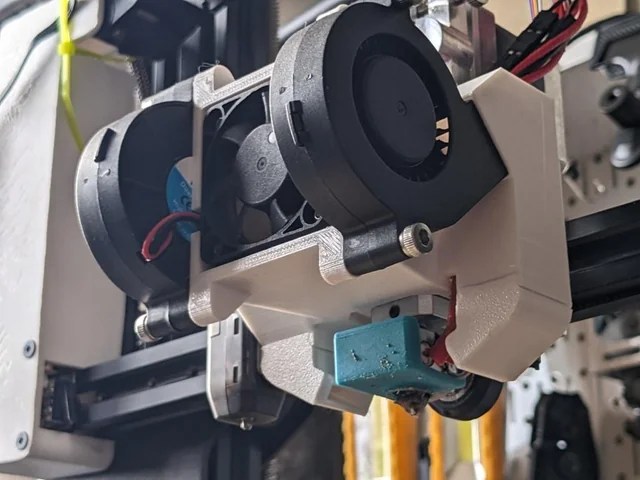
Tip: Print a custom fan shroud. You can use systems like the Hero Me or Petsfang. This will make installation easier. It will also make airflow more efficient.
[Link to Hero Me original development page]
[Link to download Hero Me Ender 3 dual fan duct STL files from Thingiverse]
[Link to check de current price on amazon for Dual 5015 Part Cooling Fan Duct]
🤫 2. Silent Motherboard (TMC Drivers)
Replacing the stock Ender 3 board with a silent motherboard is one of the most satisfying upgrades you can make. The board should be equipped with TMC2208 or TMC2209 stepper drivers, such as the Creality 4.2.7 or the BTT SKR Mini E3.
[Check the current price on Amazon]
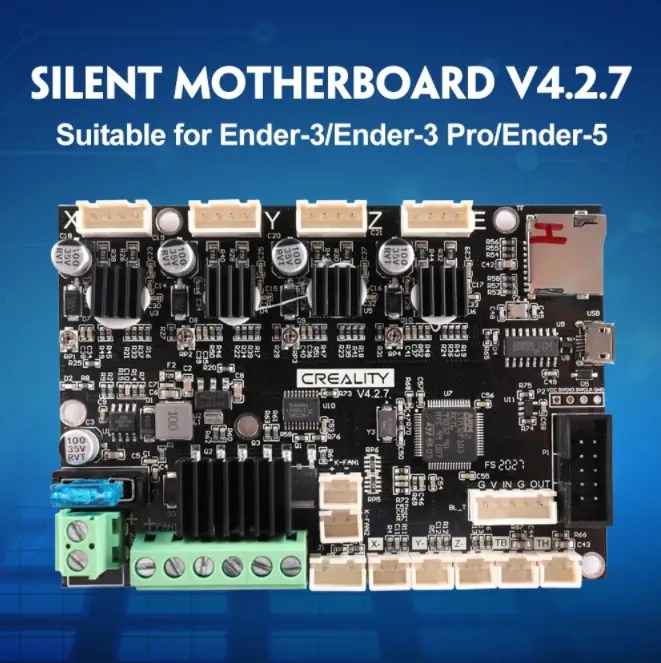
It eliminates the loud, mechanical whining typical of A4988 drivers. This makes your printer nearly silent in operation. It also unlocks microstepping capabilities that translate into better print quality. These TMC drivers allow for smoother motion. They achieve this due to finer step resolution. This reduces artifacts like ghosting and ribbing, especially on curves or intricate surfaces.
💡 Personal note: I remember thinking this upgrade would just be about noise. Printing in silence is a game-changer. This is especially true if your printer is near your bedroom or workspace. But the real surprise came when I printed the same Benchy with the new board. I noticed sharper details and cleaner walls. This was especially true around curves. It was like getting a new printer.
✅ Bonus: Some silent boards come with thermal protection features and better firmware support, making them a smart long-term investment.
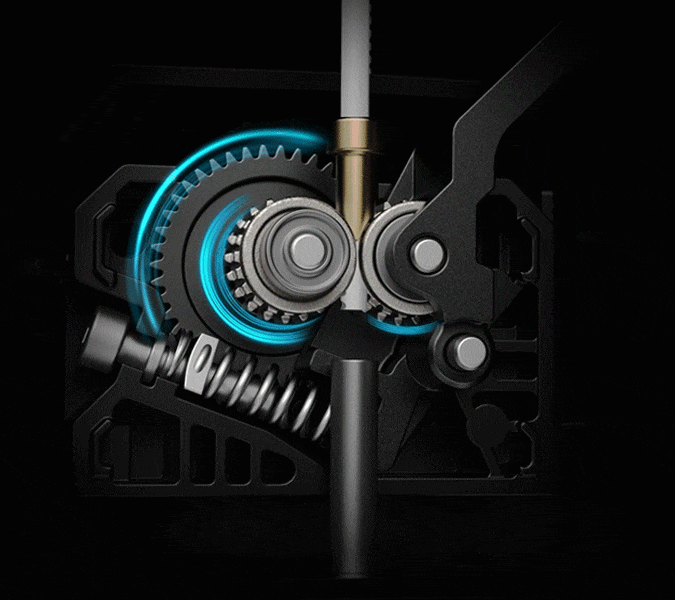
🦾 3. Dual Drive Extruder: Grip, Precision, and Reliability
A dual-drive extruder (like a Bondtech clone) grips filament from both sides. This provides more consistent extrusion. It is especially useful for flexible or slippery materials. This upgrade reduces grinding, under-extrusion, and can help with retraction tuning.
[Check the current price on Amazon]
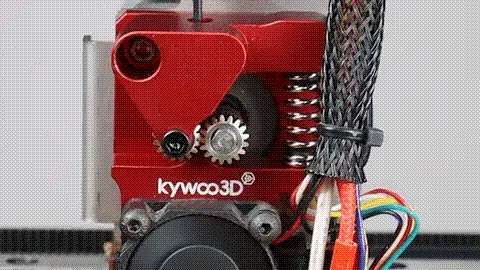
Unlike stock extruders that rely on a single gear and an idler bearing, dual drive systems like the Bondtech-style extruders grip the filament from both sides, applying even pressure and significantly improving control and consistency.
💡 Personal tip: One of the first things I noticed was how the filament grip changed. This happened when switching to a dual drive. I experienced no more chewed filament. There was no longer inconsistent flow on long prints. But it’s crucial to get the tension adjustment right. Too loose and you get slipping; too tight and the filament can deform or grind. I usually start with a mid-setting and fine-tune during a test extrusion by watching the filament surface closely.
[Check the current price on Amazon]

🛠️ Calibrate Your E-Steps!
Once installed, you must recalibrate your extruder steps/mm (E-steps), or you’ll end up over or under-extruding. Here’s how I do it:
- Preheat the nozzle and load filament.
- Mark the filament at 120 mm from the extruder entry with a caliper or ruler.
- Send a 100 mm extrusion command from your printer’s interface (via LCD or G-code).
- Measure the remaining distance from the mark to the extruder. If it’s not exactly 20 mm, you’ll need to adjust.
📐 E-Steps Formula:
E-steps = (Current E-steps × 100) ÷ Measured Extrusion
✅ Example: If your current E-steps is 95 and your extruder only pushed 92 mm:
E-steps = (95 × 100) ÷ 92 ≈ 103.26
Update it in your firmware or using an M92 command via terminal:
E103.26
M500   ; To save to EEPROM
💡 Another tip: Always do this calibration. Finish it after changing any extruder hardware. This is especially critical if you upgraded the gear ratio or motor.
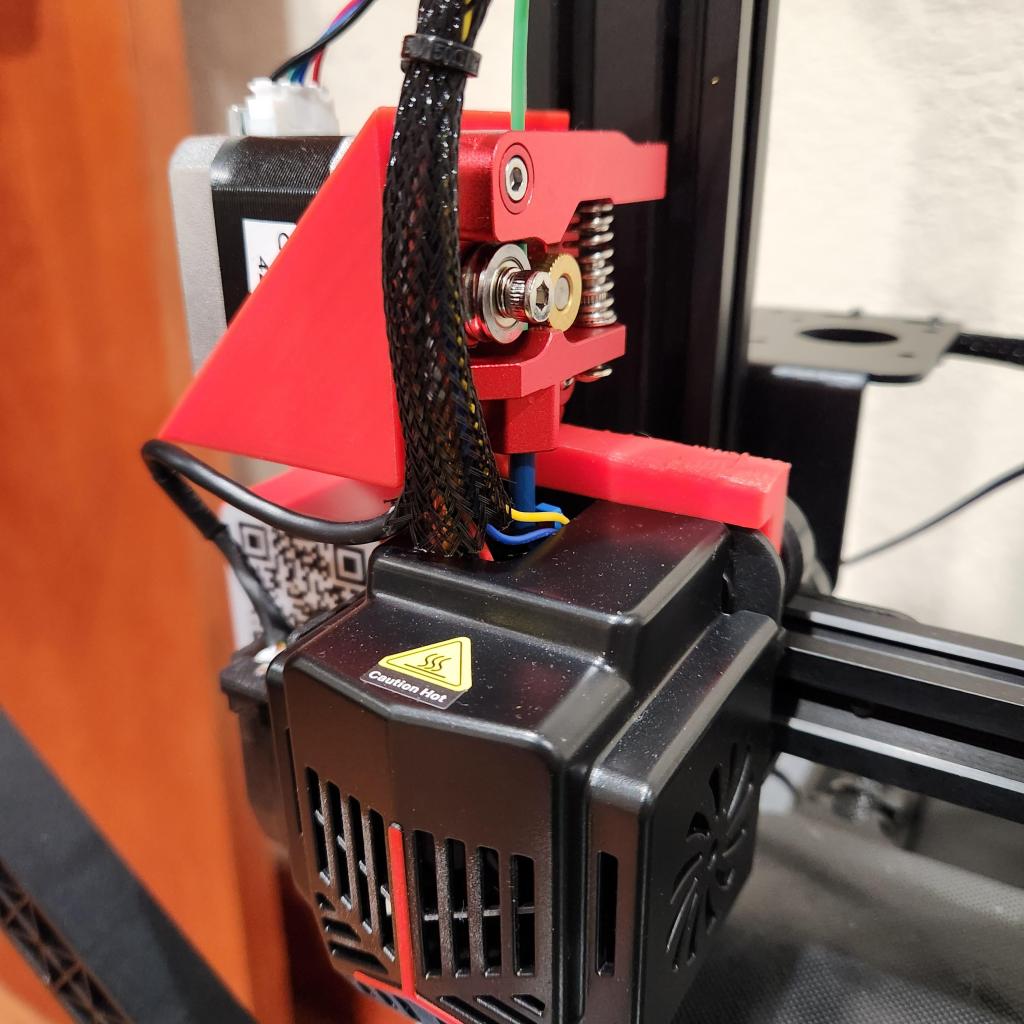
🚀 4. Direct Drive Extruder: More Control, Less Hassle (But More Complexity)
Switching to a direct drive setup on your Ender 3 can be transformative. This is especially true if you work with flexible filaments. It is also beneficial for retraction-sensitive models or if you need cleaner detail in prints. Unlike the stock Bowden system, direct drive places the extruder directly on top of the hotend. This setup gives you better responsiveness and improves extrusion accuracy.
🧩 Nonetheless, in my own setup journey, combining direct drive was trickier than expected. It also included dual drive extruders and dual 5015 fan ducts.
⚠️ Compatibility Caveats (Learn From My Mistakes)
- 🔧 Downloaded parts don’t always fit together. Many STL files for direct drive mounts or fan ducts are designed in isolation. They don’t always take into account dual extruders or oversized fan shrouds.
Tip: Try to find all-in-one upgrade packs. Look for options on Printables or Thangs. These packs are designed to be compatible as a whole. Otherwise, be ready to remix models in CAD.
[Link to an example of “all in one” upgrade from Thingiverse]
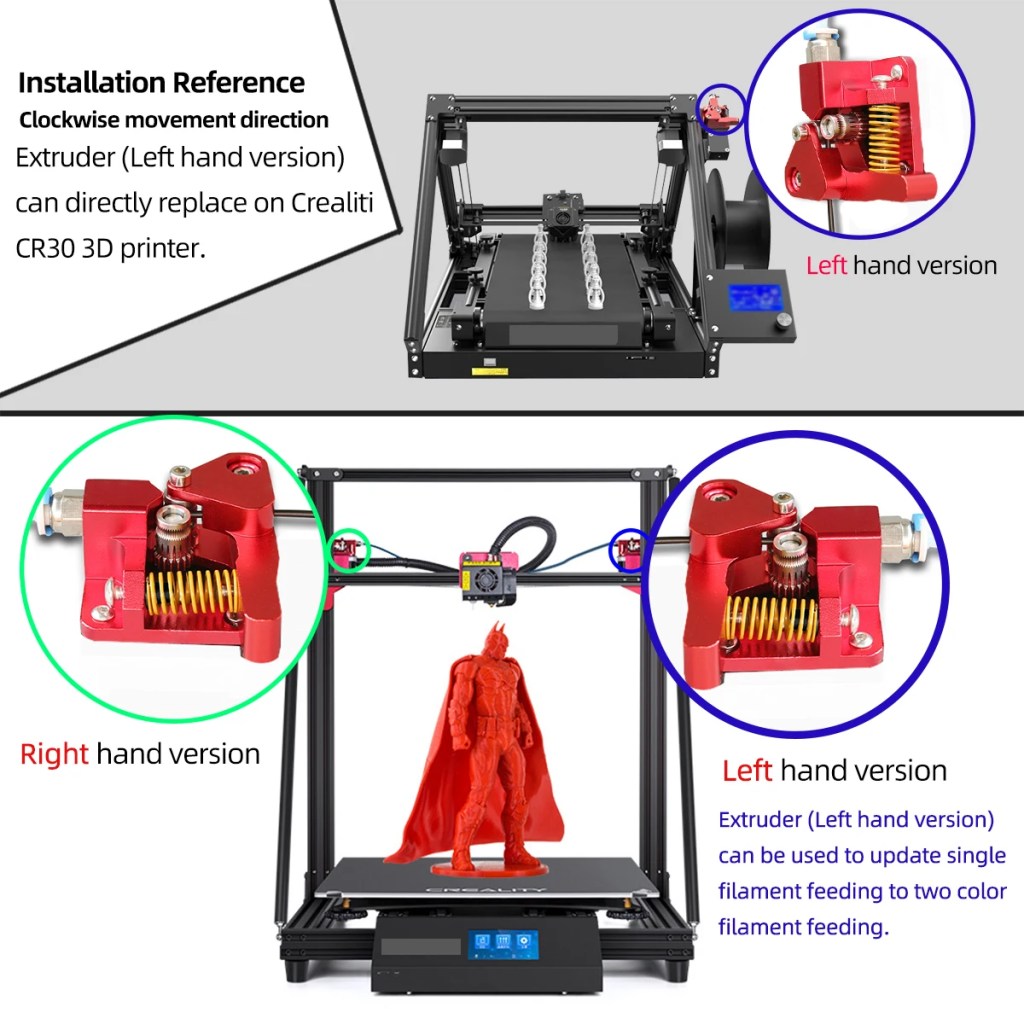
- 🔄 Left vs. right-handed extruders: I bought a dual drive extruder that was a right-hand version. But, the mount I used expected a left-hand one. The result? It extruded in reverse. I had to either invert the extruder motor direction with firmware or flip the wiring.
- Pro tip: Always double-check the gear orientation and motor wiring before your first print.
- ⚖️ Weight distribution: Adding a direct drive setup increases the weight on your X-axis. Combine that with dual fans and a heavy extruder and you’re putting extra strain on your gantry. I had to slow down print speeds slightly and tighten the eccentric nuts to prevent wobble or ghosting.
💡 Personal take: The print quality got noticeably better. Still, the upgrade only became stable after I carefully tuned retractions. I also made sure everything was mounted with proper clearance and alignment. One of the best changes was the reduction in stringing and oozing, especially on TPU. But it’s not plug-and-play — expect some trial and error.
⚡ 5. Stepper Current Tuning + Extruder Power Boost
If you want to enhance your Ender 3, adjust the stepper motor current on your control board. Ensure you make this adjustment. This adjustment can be a game changer. You can squeeze out faster prints. You can also drive heavier upgrades such as dual fans or direct drive extruders. This adjustment is advanced. Try it only if you’re confident with your printer’s hardware. Ensure you also know basic electronics.
🛠️ Step-by-Step Guide
- Unplug the Printer.
Remove the Bottom Cover.
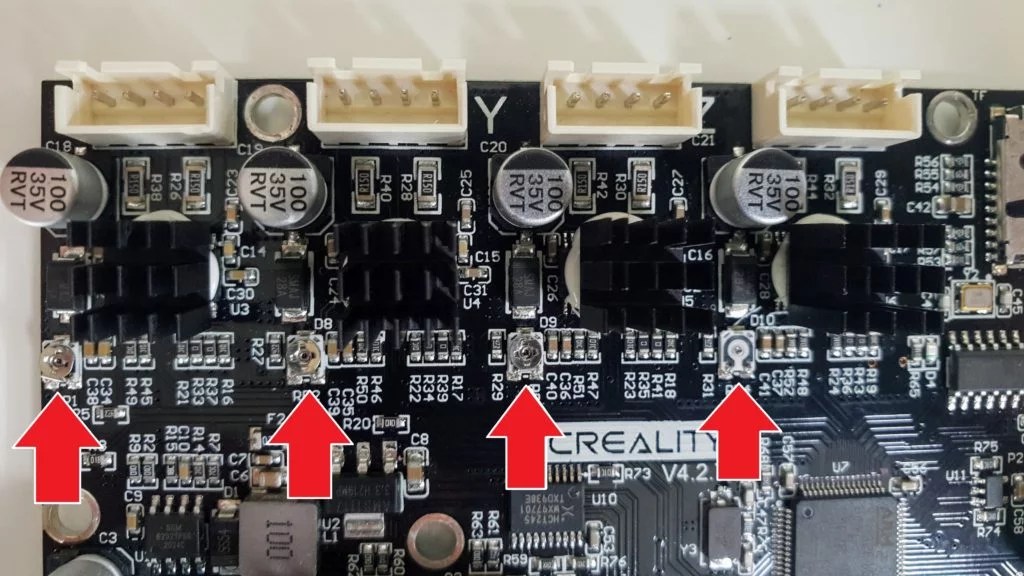
Place your printer on its side and unscrew the base to access the motherboard. Always disconnect power before opening the enclosure. - Locate the Stepper Driver Potentiometers
On most Ender 3 boards (like the V4.2.2 or V4.2.7), each stepper driver has a small round potentiometer (often blue or silver). These correspond to the X, Y, Z, and E motors.
- Understand the Limits
The ideal current settings depend on your stepper motors, but typical ranges are:- X/Y/Z motors: ~0.7 to 1.0 A
- Extruder (E): ~0.9 to 1.1 A
Anything above 1.2 A will overheat or shorten motor lifespan. Always consult your board and motor specs.
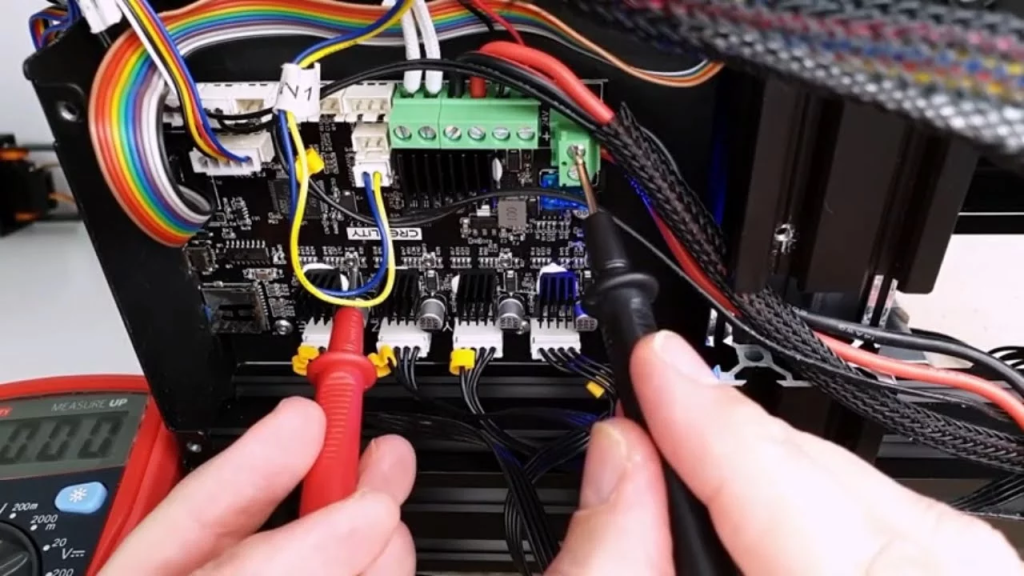
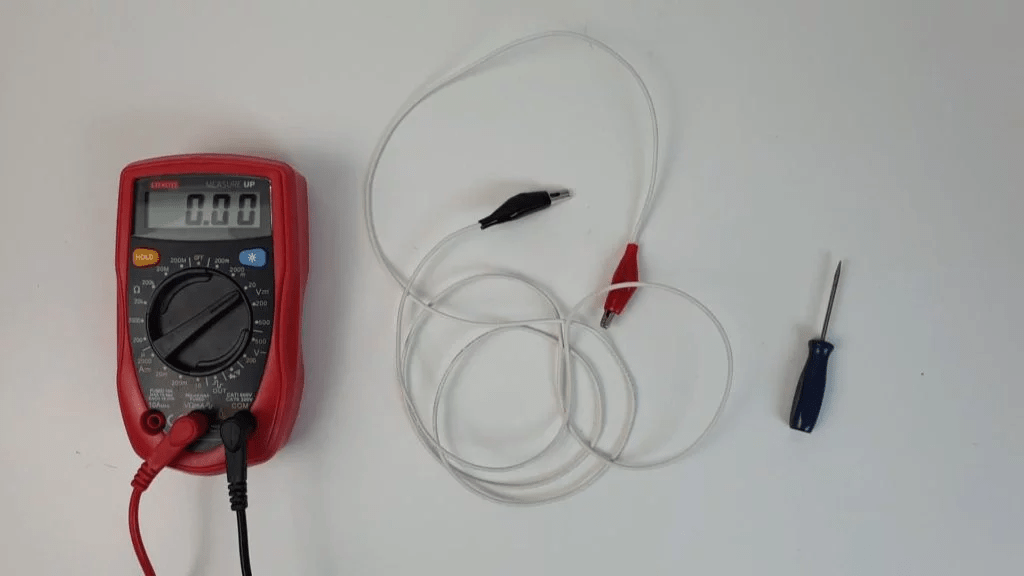
- Measure Voltage with a Multimeter
Connect the multimeter’s negative probe to a ground point. Then, attach the positive probe to the metal potentiometer.
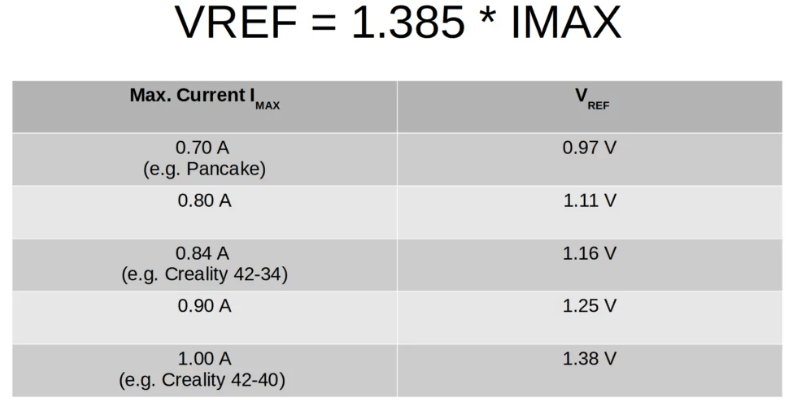
Voltage readings often correlate like this.
To find the current, use the formula:Current (A) = Vref × 2.
If you want ~1 A, your Vref should be around 0.5 V.
- Adjust the Potentiometer Gently
Use a small ceramic or plastic screwdriver (metal can short the board!)- Clockwise ➜ Increases current
- Counter-clockwise ➜ Decreases current
Make tiny adjustments — a small turn goes a long way.
- Test and Observe While Printing
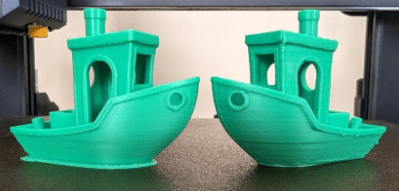
After adjustment, reassemble the printer. Run a known model like a Benchy or a fast calibration cube.- If your motors skip steps: bump current slightly.
- If they run hot or the stepper drivers reset: reduce current.
⚠️ Personal Note
I only went down this rabbit hole when my extruder motor started skipping with a heavy dual-gear drive. By slightly increasing the current (and keeping an eye on temps), I managed to print at faster speeds without under-extrusion. But remember: this is a balancing act. Too much power can overheat drivers or even damage components.
✅ Tips
Document your changes and revert if necessary.
Never adjust while the printer is on unless you’re very experienced.
Always check temperatures after increasing current.
🛠️ Printable Accessories for Purpose and Style
Thanks to the Ender 3’s popularity, there are hundreds of printable mods. You can add these mods to make your printer cleaner. They can also make it more functional or just cooler-looking. Some community favorites include:
- Cable chain or filament guide arms to prevent snags
- Screen covers for dust protection and better visibility
- Z-axis gantry supports to increase frame rigidity
- Tool holders or drawer mods
- Fan guards and PSU covers for safety and airflow control
Sites like Printables, Thingiverse, and Cults3D are full of ready-to-print accessories made by fellow enthusiasts.
🧠 Final Thoughts
Upgrading your Ender 3 doesn’t have to be expensive. Many of these mods are printable or affordable. Each can make a real difference in your prints and daily use. Start with one or two, test your results, and build from there.
💬 What Are Your Favorite Ender 3 Upgrades?
Let us know in the comments! What mods made the biggest impact for you? Are there any you regret? Share your setup or ask for advice below — we love learning from the community.
Disclaimer: As an Amazon Associate I earn from qualifying purchases. I may receive a small commission if you buy through the links on this page. This comes at no extra cost to you.

Leave a comment