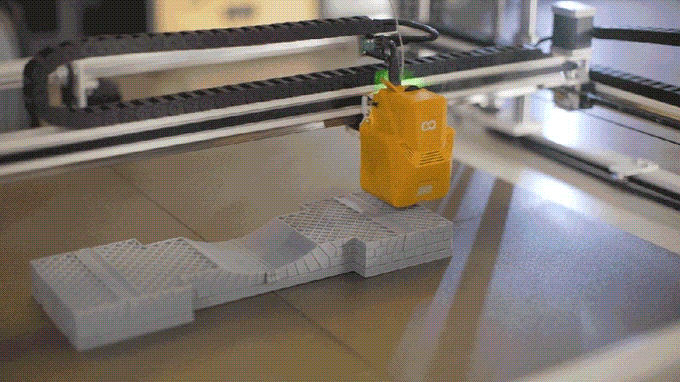
When it comes to 3D printing large models, time is the biggest enemy. A figurine that takes 3 hours at 0.2 mm layer height will take 12 hours or more if it’s scaled up. So if you want to print bigger, faster, there’s one technique that changes the game: increasing your layer height.
One of the easiest ways to speed up your prints is by increasing layer height. But here’s where most people get confused: how high can you really print before it starts falling apart?
A friend of mine recently asked, “If I switch to a 0.8 mm nozzle, printing at 0.4 mm height doesn’t sound like a huge jump, right?”
Well, actually—it is. And there’s a whole science behind the ratio of line width to layer height that makes it work.
But printing taller layers isn’t just a matter of changing one number in your slicer. It requires a solid understanding of how layer height, line width, and nozzle size interact.
🧠 Definitions for Beginners
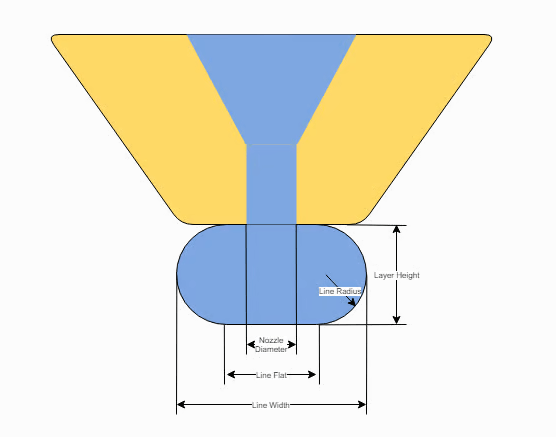
- Layer height: Thickness of each horizontal printed layer.
- Line width: Width of extruded filament as it’s deposited.
- Nozzle size: Diameter of the opening in the hotend (e.g., 0.4 mm).
- Extruder: Mechanism that pushes filament into the hotend.
🔍 Why Layer Height Alone Isn’t Enough
Let’s say you increase your layer height to 0.4 mm, but keep using a 0.4 mm nozzle and default settings. What happens?
- Your layers become unstable
- Poor adhesion between layers
- The print fails mid-way, especially on overhangs or tall walls
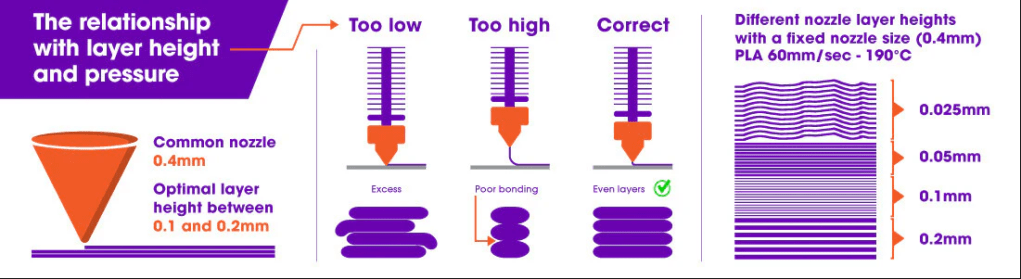
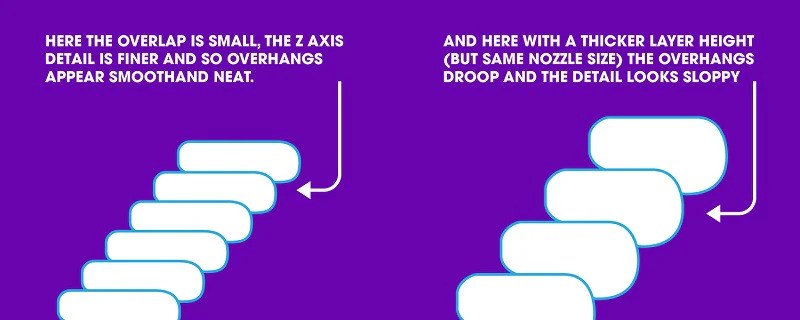
Why? Because layer height and line width need to be tuned together. A taller layer has less surface area to bond with the one below. To compensate, you must increase the line width. This action deposits a wider bead of filament. It gives the next layer a more stable foundation.
⚙️ The Key Ratio: Line Width vs. Layer Height
This is the golden rule:
Layer height should be no more than 75–80% of your line width for strong layer bonding.
If your line width is too narrow for your layer height, layers won’t stick properly. If it’s too wide, you’ll waste filament without real gains.
💡 Example:
If you want to print at 0.4 mm layer height, your line width must be at least 0.5–0.55 mm, ideally closer to 0.6 mm.
That means:
- Use a 0.6 mm nozzle or higher
- Set your line width manually in the slicer (don’t rely on auto)
🧪 Beyond the Defaults: Manual Control in Your Slicer
Most slicers (like Cura or PrusaSlicer) auto-generate line widths based on nozzle size. But when you’re pushing the limits, manual control is key. Here’s what to adjust:
- Line Width: Start with 1.5x your nozzle diameter
- Layer Height: Keep at ~75–80% of line width
- Print Speed: May need to be lowered slightly for wide lines to adhere well
- Temperature: Increase slightly to improve flow consistency
🔩 Choosing the Right Nozzle
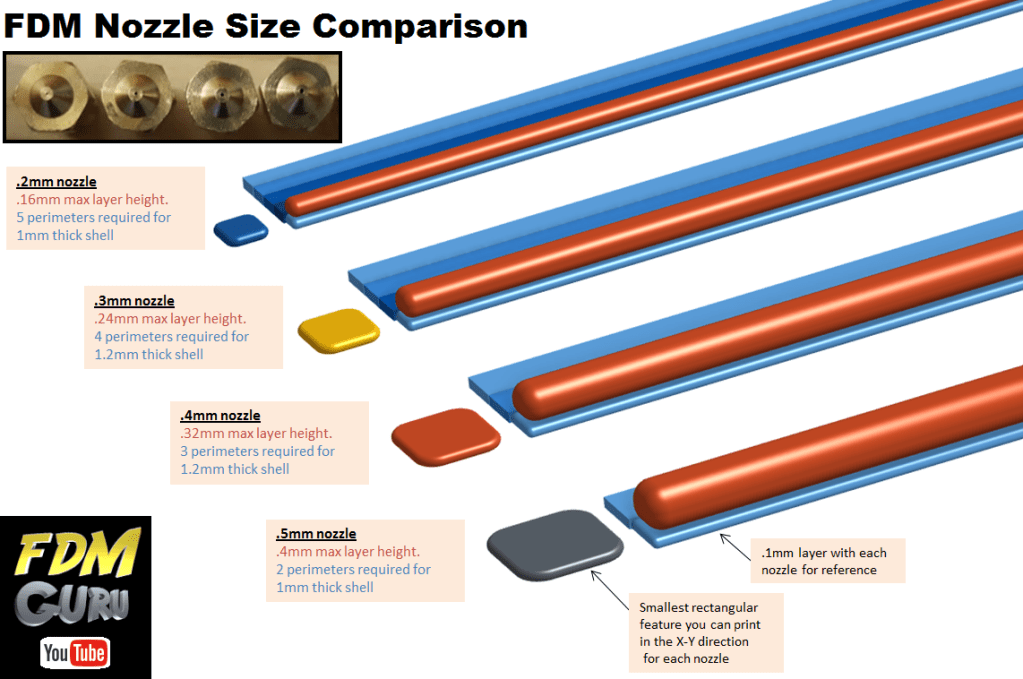
| Nozzle | Suggested Line Width | Max Layer Height | Speed Potential |
|---|---|---|---|
| 0.4 mm | 0.48–0.6 mm | ~0.36–0.48 mm | ⚡ Moderate |
| 0.6 mm | 0.72–0.9 mm | ~0.58–0.72 mm | ⚡⚡ Fast |
| 0.8 mm | 0.96–1.2 mm | ~0.76–0.96 mm | ⚡⚡⚡ Very fast |
| 1.0 mm | 1.2–1.4 mm | ~1.0–1.1 mm | ⚡⚡⚡⚡ Ultra fast |
🛠️ Tip: Don’t forget to calibrate your extrusion steps/mm when switching nozzles—especially above 0.6 mm.
🧱 Strength vs. Speed: When Is It Worth It?
Printing at 0.3 mm layer height with a 0.6 mm line width won’t just cut print times—it can make your parts structurally stronger. Thicker layers mean fewer layer interfaces, which are usually the weakest point of a print.
So when to use tall layers?
- Prototyping large enclosures
- Functional prints where surface finish isn’t critical
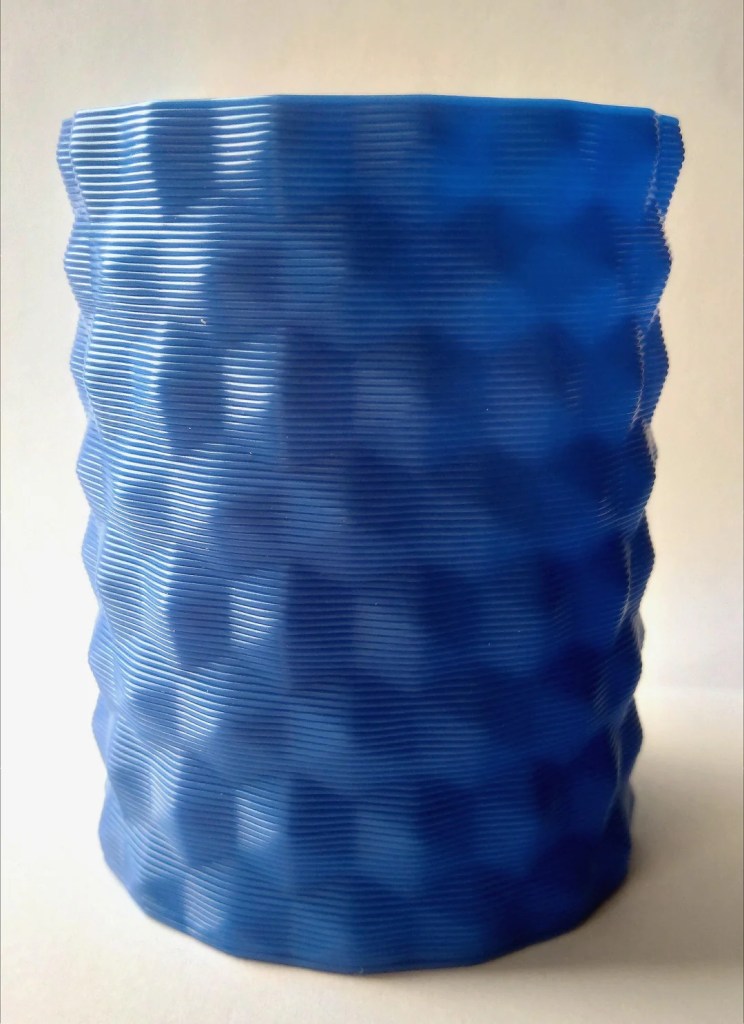
- Statues, vases, terrain, or anything big and solid
When to avoid it?
- Highly detailed miniatures
- Thin walls or sharp features
- Parts with small holes or threads
📏 Fine Layers: Don’t Over-extrude
On the opposite end of the spectrum, when you print very thin layers (like 0.12 mm), you don’t need thick lines.
A 0.3 mm line width is enough for 0.12 mm layer height. Printing it with 0.45 mm would just waste filament and cause elephant’s foot or excess squish on the first layers.
📦 Real-World Results

I’ve printed statues over 30 cm tall using:
- 0.8 mm nozzle
- 0.9 mm line width
- 0.6 mm layer height
- Print speed ~40 mm/s
- 0.4 mm wall width / 3 perimeters
Result?
A 22-hour print became an 8.5-hour print, with solid bonding and a surprisingly decent surface finish.
🧠 Frequently Asked Questions (FAQs)
Q1: Can I print with a 0.8 mm nozzle at 0.8 mm layer height?
Technically yes, but it’s not recommended. A good rule of thumb is that maximum layer height should be around 75% of your line width. So if you’re printing with a 0.8 mm line width, stick to about 0.6 mm layer height for optimal layer bonding and print quality.
Q2: Does printing with high layer height always mean lower quality?
Not necessarily. For large functional parts or drafts/prototypes, a 0.4–0.6 mm layer height can still produce strong, usable parts. You’ll lose surface detail, but gain in speed and robustness. It’s all about what matters most for your specific use case.
Q3: Can I just increase print speed instead of layer height?
You can—but that only gets you so far. Increasing print speed without adjusting line width and layer height can cause under-extrusion, poor adhesion, and print failures. A better approach is to increase the volume per layer with a greater layer height. Also, adjust the line width accordingly. Keep speeds manageable for your hotend and extruder.
Q4: What’s the ideal line width to layer height ratio?
A safe and effective ratio is about 2:1.
For example:
- 0.3 mm layer height → 0.6 mm line width
- 0.4 mm layer height → 0.8 mm line width
You can go higher. However, as the layer height increases, you rely more on proper flow rate, temperature, and adhesion.
Here you can find a calculator for speed for several combinations of line widths and heights
Q5: What slicer settings should I adjust when using large layer heights?
In addition to Layer Height and Line Width, tweak these:
- Wall line count: Reduce to 2 for faster prints, or increase for strength
- Top/Bottom layers: May need more to ensure solid shells (e.g., 4–5 at 0.6 mm)
- Cooling: Reduce fan for better inter-layer adhesion
- Infill: Use lower infill % or gyroid pattern for quicker builds
Q6: Any real-life example of this working well?
Yes! In one of my prints, I used a 0.8 mm nozzle with 0.6 mm layer height and 0.96 mm line width to print a 20 cm sculpture in just under 5 hours. Normally that same model would take over 15 hours at 0.2 mm height. The result wasn’t ultra-detailed, but perfect for a quick visual prototype.
Q7: What if I don’t have a large nozzle?
You can still experiment with faster prints using your default 0.4 mm nozzle:
- Try 0.28–0.32 mm layer height
- Increase line width to 0.48–0.6 mm
- Raise temp slightly (+5–10°C) to ensure proper flow
While not as fast as big-nozzle prints, this setup still gives noticeable time savings.
Q8: Any danger in going too high with layer height?
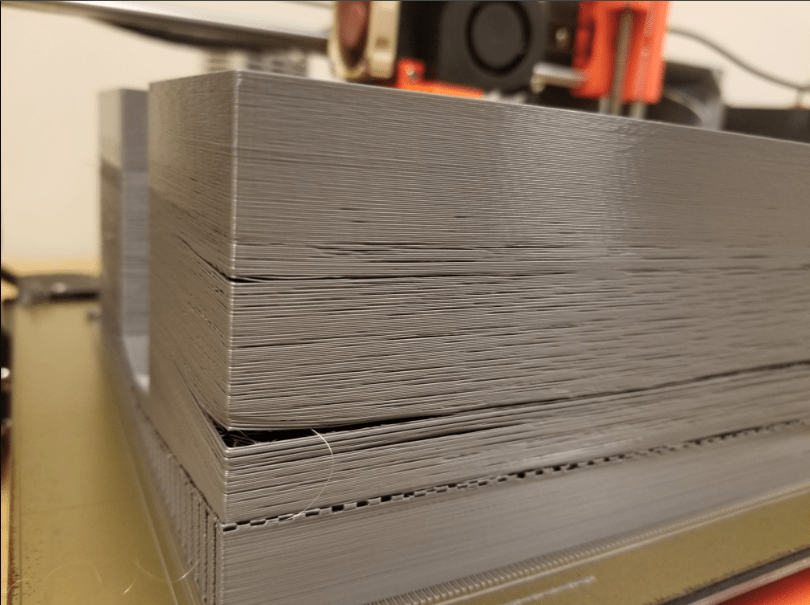
Yes—beyond a certain point, the layers won’t stick well, resulting in weak parts. Your extruder will also struggle to push enough material, and prints may suffer from poor bridging, under-extrusion, and z-banding. Always test and tweak incrementally.
🛠️ Common Issues When Printing Tall Layers
| Issue | Cause | Solution |
|---|---|---|
| Weak layer adhesion | Layer height too high vs line width | Lower height or increase line width |
| Extrusion skipping | Extruder can’t keep up | Increase temp, slower speed |
| Visible under-extrusion | Insufficient flow | Calibrate esteps, increase flow rate |
| Poor bridging or overhangs | Thick layers sagging | Use supports, lower layer height |
🏁 Final Thoughts: Speed Without Sacrifices
Printing large models quickly is absolutely possible—if you understand the relationship between line width, layer height, and nozzle size.
Here are the main takeaways:
- 🧠 Wider lines = taller layers. You can safely print up to ~75% of your line width as layer height.
- 🔧 Adjust your nozzle, temperature, flow rate, and wall/infill settings for best results.
- ⏱️ Higher layer heights significantly reduce print time, but reduce detail—know when that trade-off is acceptable.
- 🧪 Experimentation is key: even a 0.4 mm nozzle can print faster with proper tuning.
With the right setup and expectations, you can dramatically cut print time—without sacrificing strength or stability. Don’t be afraid to tweak, test, and push your printer to its full potential.
💬 What’s Your Fast-Print Setup?
- Have you tried printing with 0.6 mm+ layer heights?
- What’s your go-to nozzle size for large prints?
- Ever used a 1.0 mm nozzle?
🛠️ Share your experience in the comments or send me a photo—I’ll feature some results in future posts!

Leave a comment